Create an organizational hierarchy in Power BI with ease using parent-child DAX functions.

An organizational chart is a mapping of the hierarchical structure and relationship chains created within strategic management as a whole. Therefore, the organizational chart is an important starting point for businesses and is of critical importance.
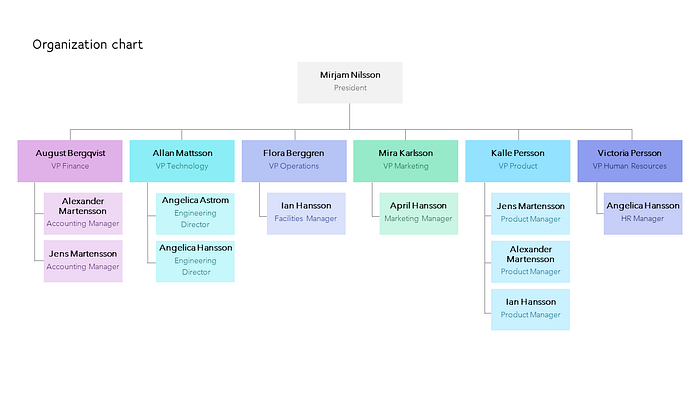
The organizational hierarchy consists of a table that shows the type of structure the company is in, specifies its basic functions, and reveals the relationships of the departments and subunits with each other.
Let’s look at an example in the table:
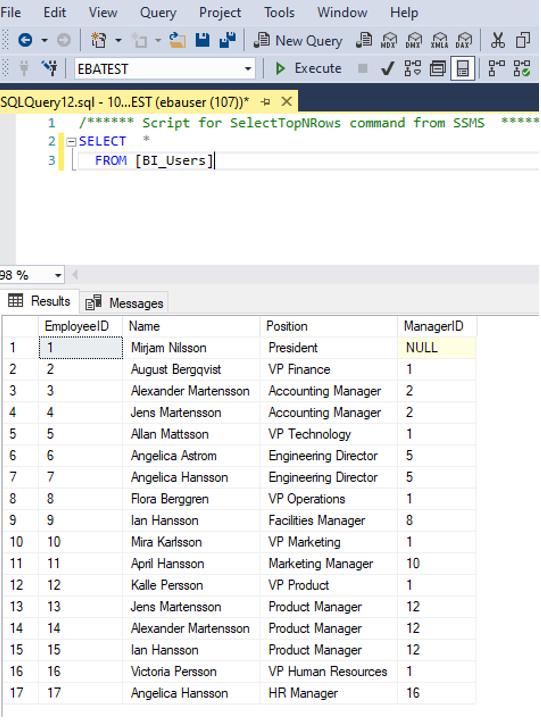
In the BI_Users table, I created, August’s manager in the second row is the president, and the president’s registration number is 1. Six people work under the president: August, Allan, Flora, Mira, Kalle, and Victoria. Since this table is not categorized, it is quite difficult for us to visualize it hierarchically.
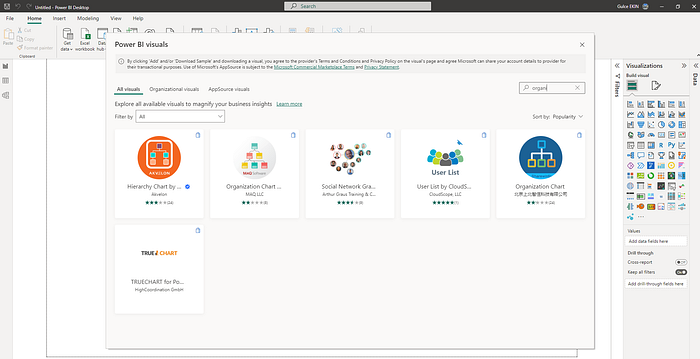
While it’s quite easy to use an organization chart using special images from the Power BI Store, we can create an organization chart using slicers if we want to. To do so, we can use the functions in DAX.
In Power BI, we import the table that we have created by connecting to the database with the SQL Server database.
Let’s start with the first function and create a new column. I want to create a row hierarchy for each row, which we can do using the PATH function. This function has two parameters: first, we need to specify the employee’s ID, and then the ID of the manager to whom they are connected (ManagerID).
PATH function (DAX) – DAX
Returns a delimited text string with the identifiers of all the parents of the current identifier, starting with the…
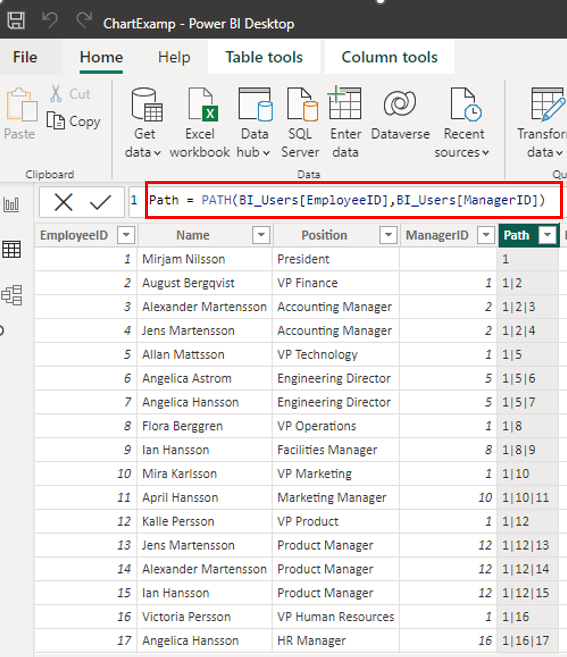
If you think of this function as an organizational chart, it will show the hierarchy from the lowest employee to the highest employee. Now that we have created the hierarchy path, the other function we will use with it is the PATHCONTAINS function. This function checks whether the level we specify is in the hierarchy path. The first parameter is the hierarchy path (Path) that we created earlier, and the second parameter is the element we want to search for on this path.
For example, I can write item: 12 to find out if Kalle is the manager of any of the employees or not by using this function.
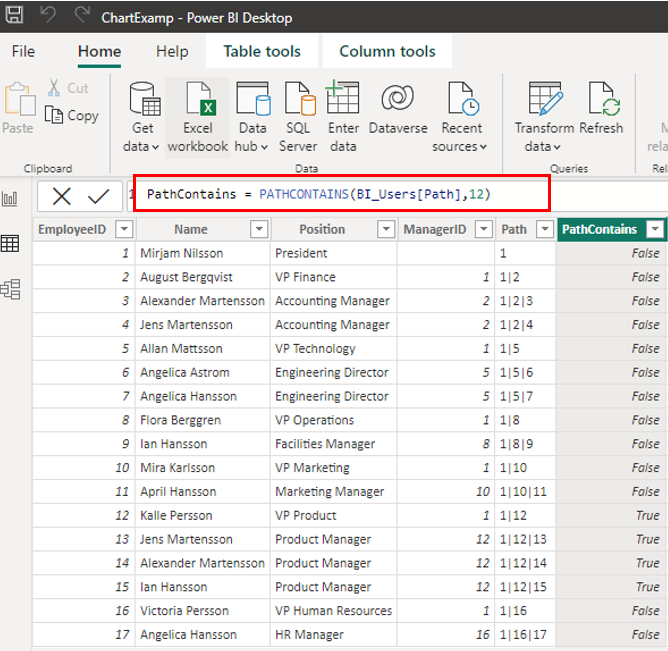
Let’s proceed with creating levels within the hierarchy this time. I can do this using the PATHITEM function. Whichever number you put in the variable after the specified hierarchy column will return that level.
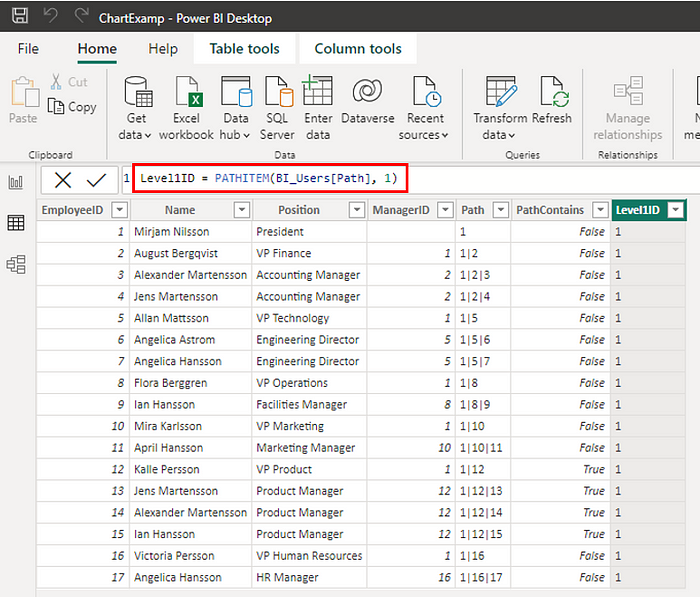
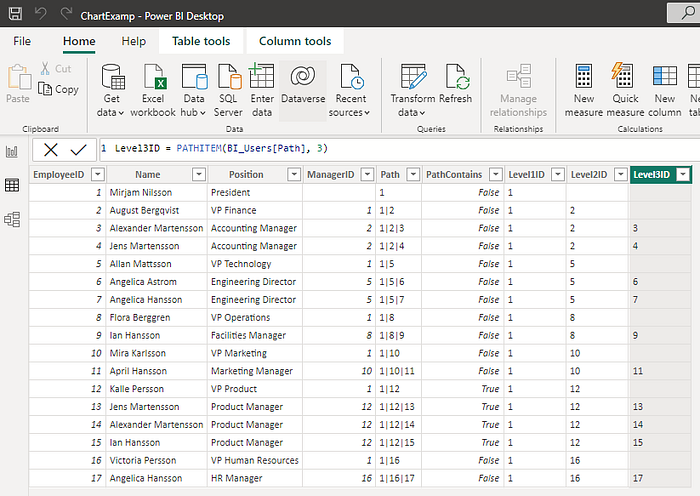
In the same way, I can create the second level and write the second level to the variable. Since the president is the first level, the second level is empty, so you can continue and create the levels in this organizational chart. We can also mention the names of people at these levels in another column. After checking whether the current line is in all other lines via the EARLIER function, I can collect the name in the filtered line.
EARLIER function (DAX) – DAX
Returns the current value of the specified column in an outer evaluation pass of the mentioned column. EARLIER is…
I will use the FILTER command to scan the row at each level across the entire table by creating a new column again. Using the SELECTEDVALUE function, I take the employee’s name, iterate over the entire table(ALL) in the filter section and check whether the current row in the table is equal to the ID specified at the level. If it is equal, I will filter this line.
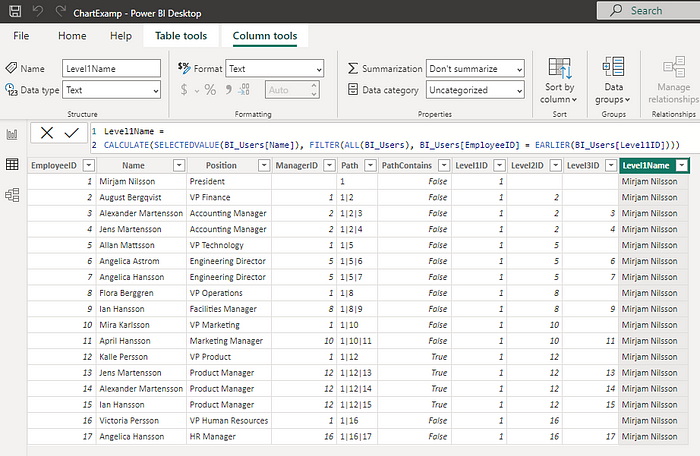
NOTE: DAX comparison operations do not support comparing integer-type values with text-type values.
Finally, if I want to specify whether the person in the organization is an administrator or not, we can use the CONTENTS function. The column is named IsManager.
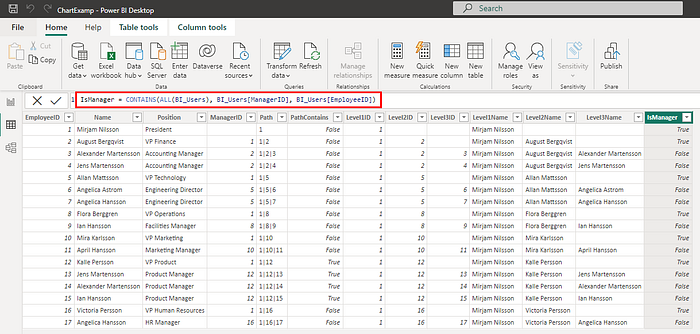
Based on the employee table, we have seen how to create a hierarchy.
Now let’s create a Slicer. Then you can check whether the filtering has taken place by creating a Table.
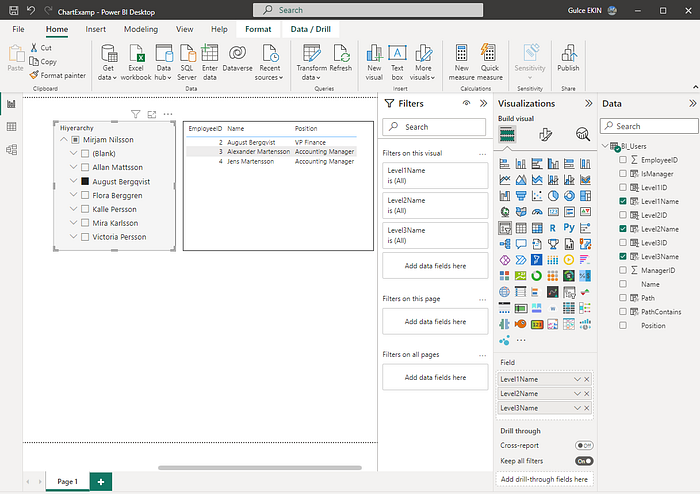
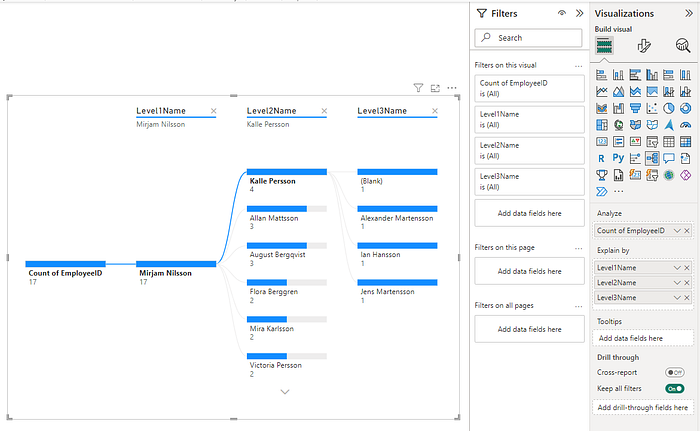
- Create a table that shows the hierarchical structure of the company and the relationships between departments and subunits.
- Import the table into Power BI.
- Use the PATH function to create a row hierarchy for each employee, specifying their ID and the ID of their manager.
- Use the PATHCONTAINS function to check whether a specific employee is a manager or not.
- Use the PATHITEM function to create levels within the hierarchy and return the name of the employee at that level.
- Use the FILTER function to scan the row at each level across the entire table and filter the current row based on the ID specified at that level.
- Use the CONTENTS function to specify whether an employee is an administrator or not.
- Create a slicer and check if the filtering has taken place by creating a table.
